Mason jars have been all over the place lately. I've seen them used as mugs, flower pots, tumblers, and even used for light fixtures. I'm a huge fan of them for their versatility and so naturally, sometime last year I think, I started looking for ways to make them pretty. I found several pictures of mason jar cozies and thought, hey, I can make that!
As I mentioned before, I'm not a huge fan of following patterns for items, so I endeavored to figure out the basic form, and I'm going to share it with you now!
I like to make my cozies with a bottom. I think the majority of designs I have seen out there are bottomless, which makes them a bit simpler to make where you can either just make a length and sew the ends together to make a round cozy or just crochet in the round. However, if you intend to use the jar with candles, as I like to, then the bottom will get very hot very quickly and while I doubt it will damage surfaces, it can definitely burn your hand if you touch the bottom.
So here's how I do it:
Here are the materials I am using for this project:
The thread is Aunt Lydia's cotton crochet thread in size 3, the hook is size D, or 3.25mm. This is a standard mason jar.
I start by picking out a lacy stitch; these make the light from a tea light candle inside play on the wall very prettily. For this project, here's the pattern I'm using from the Crochet Stitches Visual Dictionary by Robyn Chachula:
This pattern is a fairly simple lacy stitch. It calls for a foundation row that is a multiple of 10 stitches plus three. The extra three are there to even out the ends of a flat piece of work. However, I will be working this cozy from a circle, so I don't need the extra three. Since I need a multiple of 10, I start my circle with a magic circle, ch 2, and stitch 9 hdc in the circle, closing the circle with a sl st; this gives me 10 hdc to start with:
From here, I will increase the circle until it is big enough to cover the bottom of the jar:
ch 2 in the first hdc, hdc in the same hdc, 2 hdc in each hdc around; join with sl st (10 hdc). Do not turn.
ch 2 in the first hdc, hdc in the same hdc, 1 hdc in the next hdc, *2 hdc in the next hdc, 1 hdc in the next hdc;* repeat from * to the end and join with sl st (30 hdc). Do not turn.
ch 2 in the first hdc, hdc in the same hdc, 1 hdc in the next 2 hdc, *2 hdc in the next hdc, 2 hdc in the next 2 hdc;* repeat from * to the end and join with sl st (40 hdc). Do not turn.
ch 2 in the first hdc, hdc in each hdc around; join with sl st.
At this point, the circle should be big enough to cover the bottom of the jar.
Do not turn. Working in the back loops only, ch 2 in the first hdc, hdc in back loops of each hdc around; join with sl st (40 hdc)
Working in the back loops will make the rest of the project work straight up.
At this point, you can start working the lace pattern normally, joining the rounds with a sl st. The cozy will work straight up because you aren't making any increases any more. Once the cozy is long enough to reach the top of the widest part of the jar, I finish it off with a row of hdc. The hdc row will be a bit tighter than the lace pattern, so it will be snug enough for the neck of the jar.


You can really use any lace stitch pattern, just look at how many chains are on the foundation row. For example, if the stitch pattern calls for a multiple of 8, start the circle with 8 hdc in the magic circle; if it calls for a multiple of 11, start the circle with 11 hdc. I have found that starting the circle with 7-12 is best. If your pattern calls for a smaller multiple, like a multiple of 6, I just go ahead and start the circle with 12 (6X2) and this keeps the circle from being too tight and curve up rather than stay flat. If it's bigger than 12, like 14, I start the circle with 7 and increase and even number of times to get the same effect. The cozy should fit snugly so it won't fall off or droop.
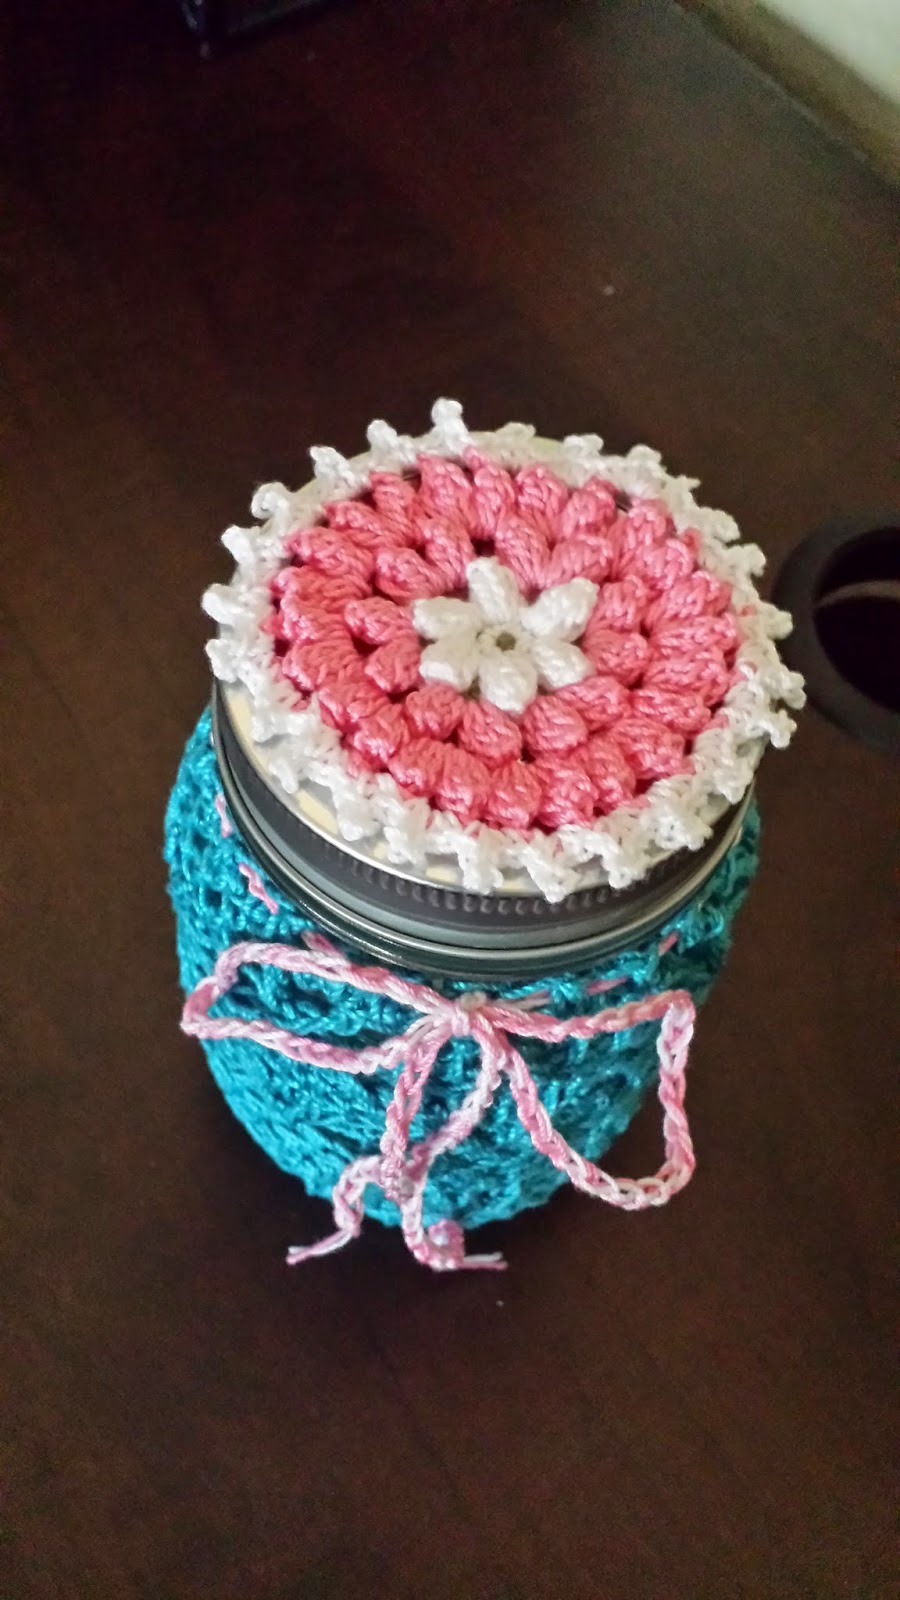
This jar is going to be a gift so I like to dress it up a bit. Flowers are great motifs to make for the jar lid, and ribbons or a single long chain threaded through the top and tied in a bow make a very pretty touch. I am going to fill this jar with chocolates, since the recipient is a chocolate lover, and include a tea light for when it's empty. The tea light effect is so pretty and makes great decor.
I hope you've enjoyed this tutorial. Please comment with any questions or clarification requests. Sometimes I just kind of play around with these projects until I get it how I like it, and I encourage you to do the same.
Like my Facebook page at https://www.facebook.com/cantstophooking
Shop my Etsy store at https://www.etsy.com/shop/CantStopTheHooking


No comments:
Post a Comment